Monday, May 30, 2011

Abstract Factory Pattern in .Net with Example (C#)

Abstract Factory Pattern
Abstract Factory pattern is used to create concrete class instances without specifying the exact class type (ie, to create instance of a classe without specifying the exact class type). Abstract Factory Pattern is one of the Creational Design Patterns. Creational Design patterns are design patterns that handle object creation mechanisms.

The Abstract Factory Pattern Structure


  1. Abstract Factory: Declares an interface that creates abstract objects.


  2. Concrete Factory: Which implements the operations declared in the Abstract Factory. In Abstract Factory pattern, it may have multiple Concrete Factory classes.


  3. Abstract Product: Declares an interface that creates abstract result objects.


  4. Concrete Product: This will be the object created by the corresponding concrete factory. It implements the opreations declared in the Abstract Product.


  5. Client: Client will use only interfaces as part of Abstract Factory and Abstract Product.
For more clarification and step by step implementation of Abstract Factory Pattern, please go through the following example. The following application act as an interface for both Sql Server and Oracle databases. See how it is implemented.

Note: The following example does not cover the whole database functionality. It is just created to explain Abstract Factory pattern. Even though you can modify the code to accomplish the whole database functionality.
A Real world Example for Abstract Factory Pattern


Class Diagram


1. First we will create an Abstract Product. The below code shows an interface ("IDatabaseHelper") which will act as an Abstract Product in our sample application.

    public interface IDatabaseFactory
{
IDatabaseHelper CreateHelper();
}


Note: You can use either Inerface or an Abstract Class to create an Abstract Product.


2. Next we will create two Concrete Product which implements the Abstract Product. The classes "OracleDatabaseHelper" and "SqlDatabaseHelper" will be our Concrete Products in our sample application.

  public class SqlDatabaseHelper : IDatabaseHelper
{
private System.Data.SqlClient.SqlConnection _connection;

public System.Data.IDataReader ExecuteReader()
{
//todo
return null;
}

public System.Data.DataSet ExecuteDataSet()
{
//todo
return null;
}

public int ExecuteNonQuery()
{
//todo
return 0;
}

public object ExecuteScalar()
{
//todo
return null;
}

public void OpenConnection()
{
_connection = new System.Data.SqlClient.SqlConnection();

//todo
}

public void CloseConnection()
{
_connection.Close();
//todo
}

}


public class OracleDatabaseHelper : IDatabaseHelper
{

System.Data.OleDb.OleDbConnection _connection;

public System.Data.IDataReader ExecuteReader()
{
//todo
return null;
}

public System.Data.DataSet ExecuteDataSet()
{
//todo
return null;
}

public int ExecuteNonQuery()
{
//todo
return 0;
}

public object ExecuteScalar()
{
//todo
return null;
}

public void OpenConnection()
{
_connection = new System.Data.OleDb.OleDbConnection();

//todo
}

public void CloseConnection()
{
_connection.Close();
//todo
}
}
3. Next we will create an Abstract Factory. Here "IDatabaseFactory" interface will be our Abstract Factory.
    public interface IDatabaseFactory
{
IDatabaseHelper CreateHelper();
}
4. Next we will create a Concrete Factory which implements the Abstract Factory. Here "OracleDatabaseFactory" and "SqlDatabaseFactory" classes will act as Concrete Factory through our sample application.

Note: In Abstract Factory pattern, it is possible to have multiple Concrete Factory Classes which all implements the Abstract Factory.
 public class SqlDatabaseFactory : IDatabaseFactory
{
public IDatabaseHelper CreateHelper()
{
return new SqlDatabaseHelper();
}
}


public class OracleDatabaseFactory : IDatabaseFactory
{
public IDatabaseHelper CreateHelper()
{
return new OracleDatabaseHelper();
}
}
5. Next we can create a Client, which will use the Abstract Factory and Abstract Product. Here in our example class "DatabaseClient" acts as a client.

    public class DatabaseClient
{
private IDatabaseHelper _helper;

public DatabaseClient(IDatabaseFactory factory)
{
_helper = factory.CreateHelper();
//do any other code if needed.
}

public IDatabaseHelper Helper
{
get
{
return _helper;
}
}
}
To use the above pattern you can follow the following sample.
            DatabaseClient dbClient = new DatabaseClient(new SqlDatabaseFactory());
dbClient.Helper.OpenConnection();
//do other operations
dbClient.Helper.ExecuteNonQuery();
//do other operations
dbClient.Helper.CloseConnection();
I will upload the sample application later. You can try this example. Feel free to ask questions and doubts.

Thursday, May 26, 2011

Asp.Net Dynamic Tab Control (Load Usercontrols on each tab)

DynamicTabControl

Recently I had been developing an application, which uses many tab based things. When I looked into the default ajax tab control, I found that when rendering all the tab data is being sent to the client, this will increase the page size dramatically if we have more tabs with a lot of content. I have searched a lot to find a suitable tab control to accomodate my needs, but I was disappointed.

On this occassion I had a spark in my mind and I think about why should I develop a tab control??. This results in DynamicTabControl. Dont get confused by the name, it is not about dynamically creating tabs. It just loading its contents dynamically thats all.

When I started developing the ideas(needs) in my mind are:
1. Should be customizable (the look and feel)
2. Each tab content should be an Asp.Net WebUserControl.
3. Should load contents dynamically on selecting a tab.

Finally I got the result, I have succeeded on developing my ideas.
Follow the following steps to create DynamicTabControl.


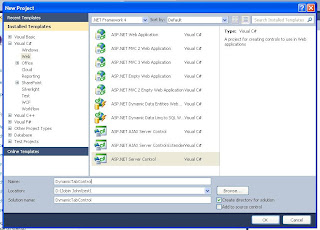
1. Create a Asp.Net Server Control Project.( To build an Asp.Net custom server controls.)


2. Add the DynamicTab class to the project and write the following code.

using System;
using System.Collections.Generic;
using System.Linq;
using System.Text;
using System.Web.UI;
using System.Web.UI.WebControls;

namespace DynamicTabControl
{
    public class DynamicTab
    {
        bool _visible = true;
        bool _enabled = true;
        string _text = "Tab Head";
        bool _selected = false;

public string UserControlPath { get; set; }
public bool Visible { set { _visible = value; } get { return _visible; } } public bool Enabled { set { _enabled = value; } get { return _enabled; } } public string Text { set { _text = value; } get { return _text; } } public bool Selected { set { _selected = value; } get { return _selected; } } public UserControl UserControl { set; get; } }
public class DynamicTabCollection:List<DynamicTab> { } }


3. Add the DynamicTab.css and write the following style definitions

.tabContainer
{
    BACKGROUND-COLOR: #FFFFFF;
    BORDER-TOP: #93BEE2 2PX SOLID;
    BORDER-BOTTOM: #93BEE2 2PX SOLID;
    BORDER-LEFT: #93BEE2 2PX SOLID;
    BORDER-RIGHT: #93BEE2 2PX SOLID;
}

.tabContent
{
    border: 0;
    height: 90%;
    width: 100%;
    border-top: #FFFFFF 5PX SOLID;
    background-color: #FFFFFF;
}

.tabOff
{
    text-align: center;
    font-family: tahoma, verdana, sans-serif;
    font-size: 85%;
    color: #003399;
    background-color: #c4e0f0;
    cursor: HAND;
    text-decoration:none;
    margin-right:5px;
    padding-left:5px;
    padding-right:5px;
}

.tabOn
{
    text-align: center;
    font-family: tahoma, verdana, sans-serif;
    font-size: 85%;
    color: #003399;
    background-color: #FFFFFF;
    cursor: HAND;
    text-decoration:none;
    margin-right:5px;
    padding-left:5px;
    padding-right:5px;
    margin-bottom:0px;
}
.tabHeads
{
    background:#c4e0f0;
}
.tabHeads a:hover
{
    margin-top: 0;
    border-color: White;
    background: White;
    color:#003399;
}


4. Include css file along with dll file. Take properties of DynamicTab.cs and set its Build Action


5. Write the following code in DynamiTabControl.cs file

using System;
using System.Collections.Generic;
using System.ComponentModel;
using System.Linq;
using System.Text;
using System.Web;
using System.Web.UI;
using System.Web.UI.WebControls;

[assembly: WebResource("DynamicTabControl.DynamicTab.css", "text/css")]

namespace DynamicTabControl
{
    [ToolboxData("<{0}:DynamicTabControl runat=server></{0}:DynamicTabControl>")]
    public class DynamicTabControl : WebControl
    {
        DynamicTabCollection _tabs;
        bool IsLoadControlAfterPostback = false;
public DynamicTabControl()
{ _tabs = new DynamicTabCollection(); } [PersistenceMode(PersistenceMode.InnerProperty)] public DynamicTabCollection Tabs { set { _tabs = value; } get { return _tabs; } } protected override void OnInit(EventArgs e) { if (Page.IsPostBack) { IsLoadControlAfterPostback = true; } InitializeControls(); base.OnInit(e); string css = "<link href=\"" + Page.ClientScript.GetWebResourceUrl(this.GetType(), "DynamicTabControl.DynamicTab.css") + "\" type=\"text/css\" rel=\"stylesheet\" />"; Page.ClientScript.RegisterClientScriptBlock(this.GetType(), "cssFile", css, false); } protected override void RenderContents(HtmlTextWriter output) { base.RenderContents(output); } private void InitializeControls() { if (_tabs.Count > 0) { Panel container = new Panel(); container.Width = this.Width; container.CssClass = "tabContainer"; Panel tabHeads = new Panel(); tabHeads.Width = Unit.Percentage(100); tabHeads.CssClass = "tabHeads"; int selCount = _tabs.Count(t => t.Selected); if (selCount == 0) { _tabs[0].Selected = true; } else if (selCount > 1) { throw new Exception("Multiple tabs selected. Please select a single tab"); } DynamicTab selectedTab = null; for (int i = 0; i < _tabs.Count; i++) { var tab = _tabs[i]; if (tab.Visible) { LinkButton lbtn = new LinkButton(); lbtn.ID = "Tab_" + i.ToString(); lbtn.CommandArgument = i.ToString(); lbtn.Click += new EventHandler(lbtn_Click); lbtn.Text = tab.Text; if (tab.Selected) { lbtn.CssClass = "tabOn"; selectedTab = tab; } else { lbtn.CssClass = "tabOff"; } tabHeads.Controls.Add(lbtn); } } Panel content = new Panel(); content.Width = Unit.Percentage(100); content.CssClass = "tabContent"; if (IsLoadControlAfterPostback.Equals(false)) { if (selectedTab.UserControl == null) { content.Controls.Add(this.Page.LoadControl(selectedTab.UserControlPath)); } else { content.Controls.Add(selectedTab.UserControl); } } container.Controls.Add(tabHeads); container.Controls.Add(content); this.Controls.Add(container); } } void lbtn_Click(object sender, EventArgs e) { IsLoadControlAfterPostback = false; var lbtn = sender as LinkButton; foreach (var tab in _tabs) tab.Selected = false; int tabIndex =int.Parse(lbtn.CommandArgument); var selectedTab = _tabs[tabIndex]; selectedTab.Selected = true; Controls.Clear(); InitializeControls(); } } }

6. Build the Server Contro project and Create new Asp.Net web application to host the control.

7. Right click on the toolbox and select Choose Items. Within the popup window browse our DynamicTabControl.dll file and click ok. The below image shows how to choose new control on to toolbox ( I have already choosen DynamicTabControl in the below image).

8. Register our control on the aspx page as shown below.

<%@ Register Assembly="DynamicTabControl" Namespace="DynamicTabControl" TagPrefix="cc2" %>


9. Add four Web User Controls in the project and put some content in each.


10. Place our DynamicTabControl in an asp.net web page and set its tab property as shown below.

<form id="form1" runat="server">
<asp:ScriptManager runat="server">
    </asp:ScriptManager>
    <asp:UpdatePanel ID="UpdatePanel1" runat="server">
    <ContentTemplate>
   
  
    <cc2:DynamicTabControl ID="DynamicTabControl1" runat="server" Width="400">
    <Tabs>
        <cc2:DynamicTab Enabled="true" Selected="true" Text="Tab Head 1"
            UserControlPath="~/UserControls/WebUserControl1.ascx" Visible="true" />
        <cc2:DynamicTab Enabled="true" Selected="false" Text="Tab Head 2"
            UserControlPath="~/UserControls/WebUserControl2.ascx" Visible="true" />
        <cc2:DynamicTab Enabled="true" Selected="false" Text="Tab Head 3"
            UserControlPath="~/UserControls/WebUserControl3.ascx" Visible="true" />
        <cc2:DynamicTab Enabled="true" Selected="false" Text="Tab Head 4"
            UserControlPath="~/UserControls/WebUserControl4.ascx" Visible="true" />
    </Tabs>
    </cc2:DynamicTabControl>


   </ContentTemplate>
    </asp:UpdatePanel>
</form>


Thats all dear friends. now you have developed a DynamicTabControl.!!!!!!!!!!

Enjoy using it....

Alter Table name in oracle

Alter Table name in oracle.
Here I have a table named Employee, I want to name its name from Employee to User. First we can create a table with name Employee.
create table Employee
(
Id int primary key ,
Name varchar2(100)
);

Next we can write the alter table statement to alter the table name. Please see the example.
ALTER TABLE Employee
RENAME to Users;

Alter column name in oracle

Alter column name in oracle.
Here I have a table named Employee, I want to rename column - Name to FullName.
First we can create a table with name Employee.
create table Employee
(
Id int primary key ,
Name varchar2(100)
);


Next we can write the alter table statement to alter the column name. Please see the example.
ALTER TABLE Employee
RENAME COLUMN Name to FullName;

Alter table in Oracle

Alter table to add column
CREATE Table Employee
(
Id int PRIMARY KEY ,
Name VARCHAR2(100)
);

ALTER TABLE Employee
ADD
(
Email VARCHAR2(50)
);

Alter table to drop constraint
CREATE TABLE Employee
(
Id INT NOT NULL,
Name VARCHAR2(100),
CONSTRAINT pk_Emploee_Id PRIMARY KEY (Id)
);

ALTER TABLE Employee
DROP CONSTRAINT pk_Emploee_Id
;


Alter table to add multiple columns
ALTER TABLE Employee
CREATE Table Employee
(
Id int PRIMARY KEY ,
Name VARCHAR2(100)
);

ADD
(
Email VARCHAR2(50),
Mobile VARCHAR2(20)
);

Create Table in Oracle

1. Simple Create table
CREATE TABLE Employee
(
Id INT ,
Name VARCHAR2(100)
);

2. Create table with primary key
CREATE TABLE Employee
(
Id INT primary key ,
Name VARCHAR2(100)
);

3. Create table with primary key constraint
CREATE TABLE Employee
(
Id INT NOT NULL,
Name VARCHAR2(100),
CONSTRAINT pk_Emploee_Id PRIMARY KEY (Id)
);